There might come a time when you would like the logo visible on your help centre to redirect your customers back to your external website, instead of to the help centre home page. You can achieve this by making a small help centre code change by following the steps below.
How to redirect the help centre logo to your external website
1. Navigate to your theme code settings by going to Guide Settings > Customize Design (![]() ) > Click Customize on the theme you would like to edit.
) > Click Customize on the theme you would like to edit.
2. Once inside the theme click the blue 'Edit Code' button to open the theme page editor.
3. Now open the header.hbs page on the left-hand sidebar - this is where you'll find the logo code which we've highlight in the screenshot below.
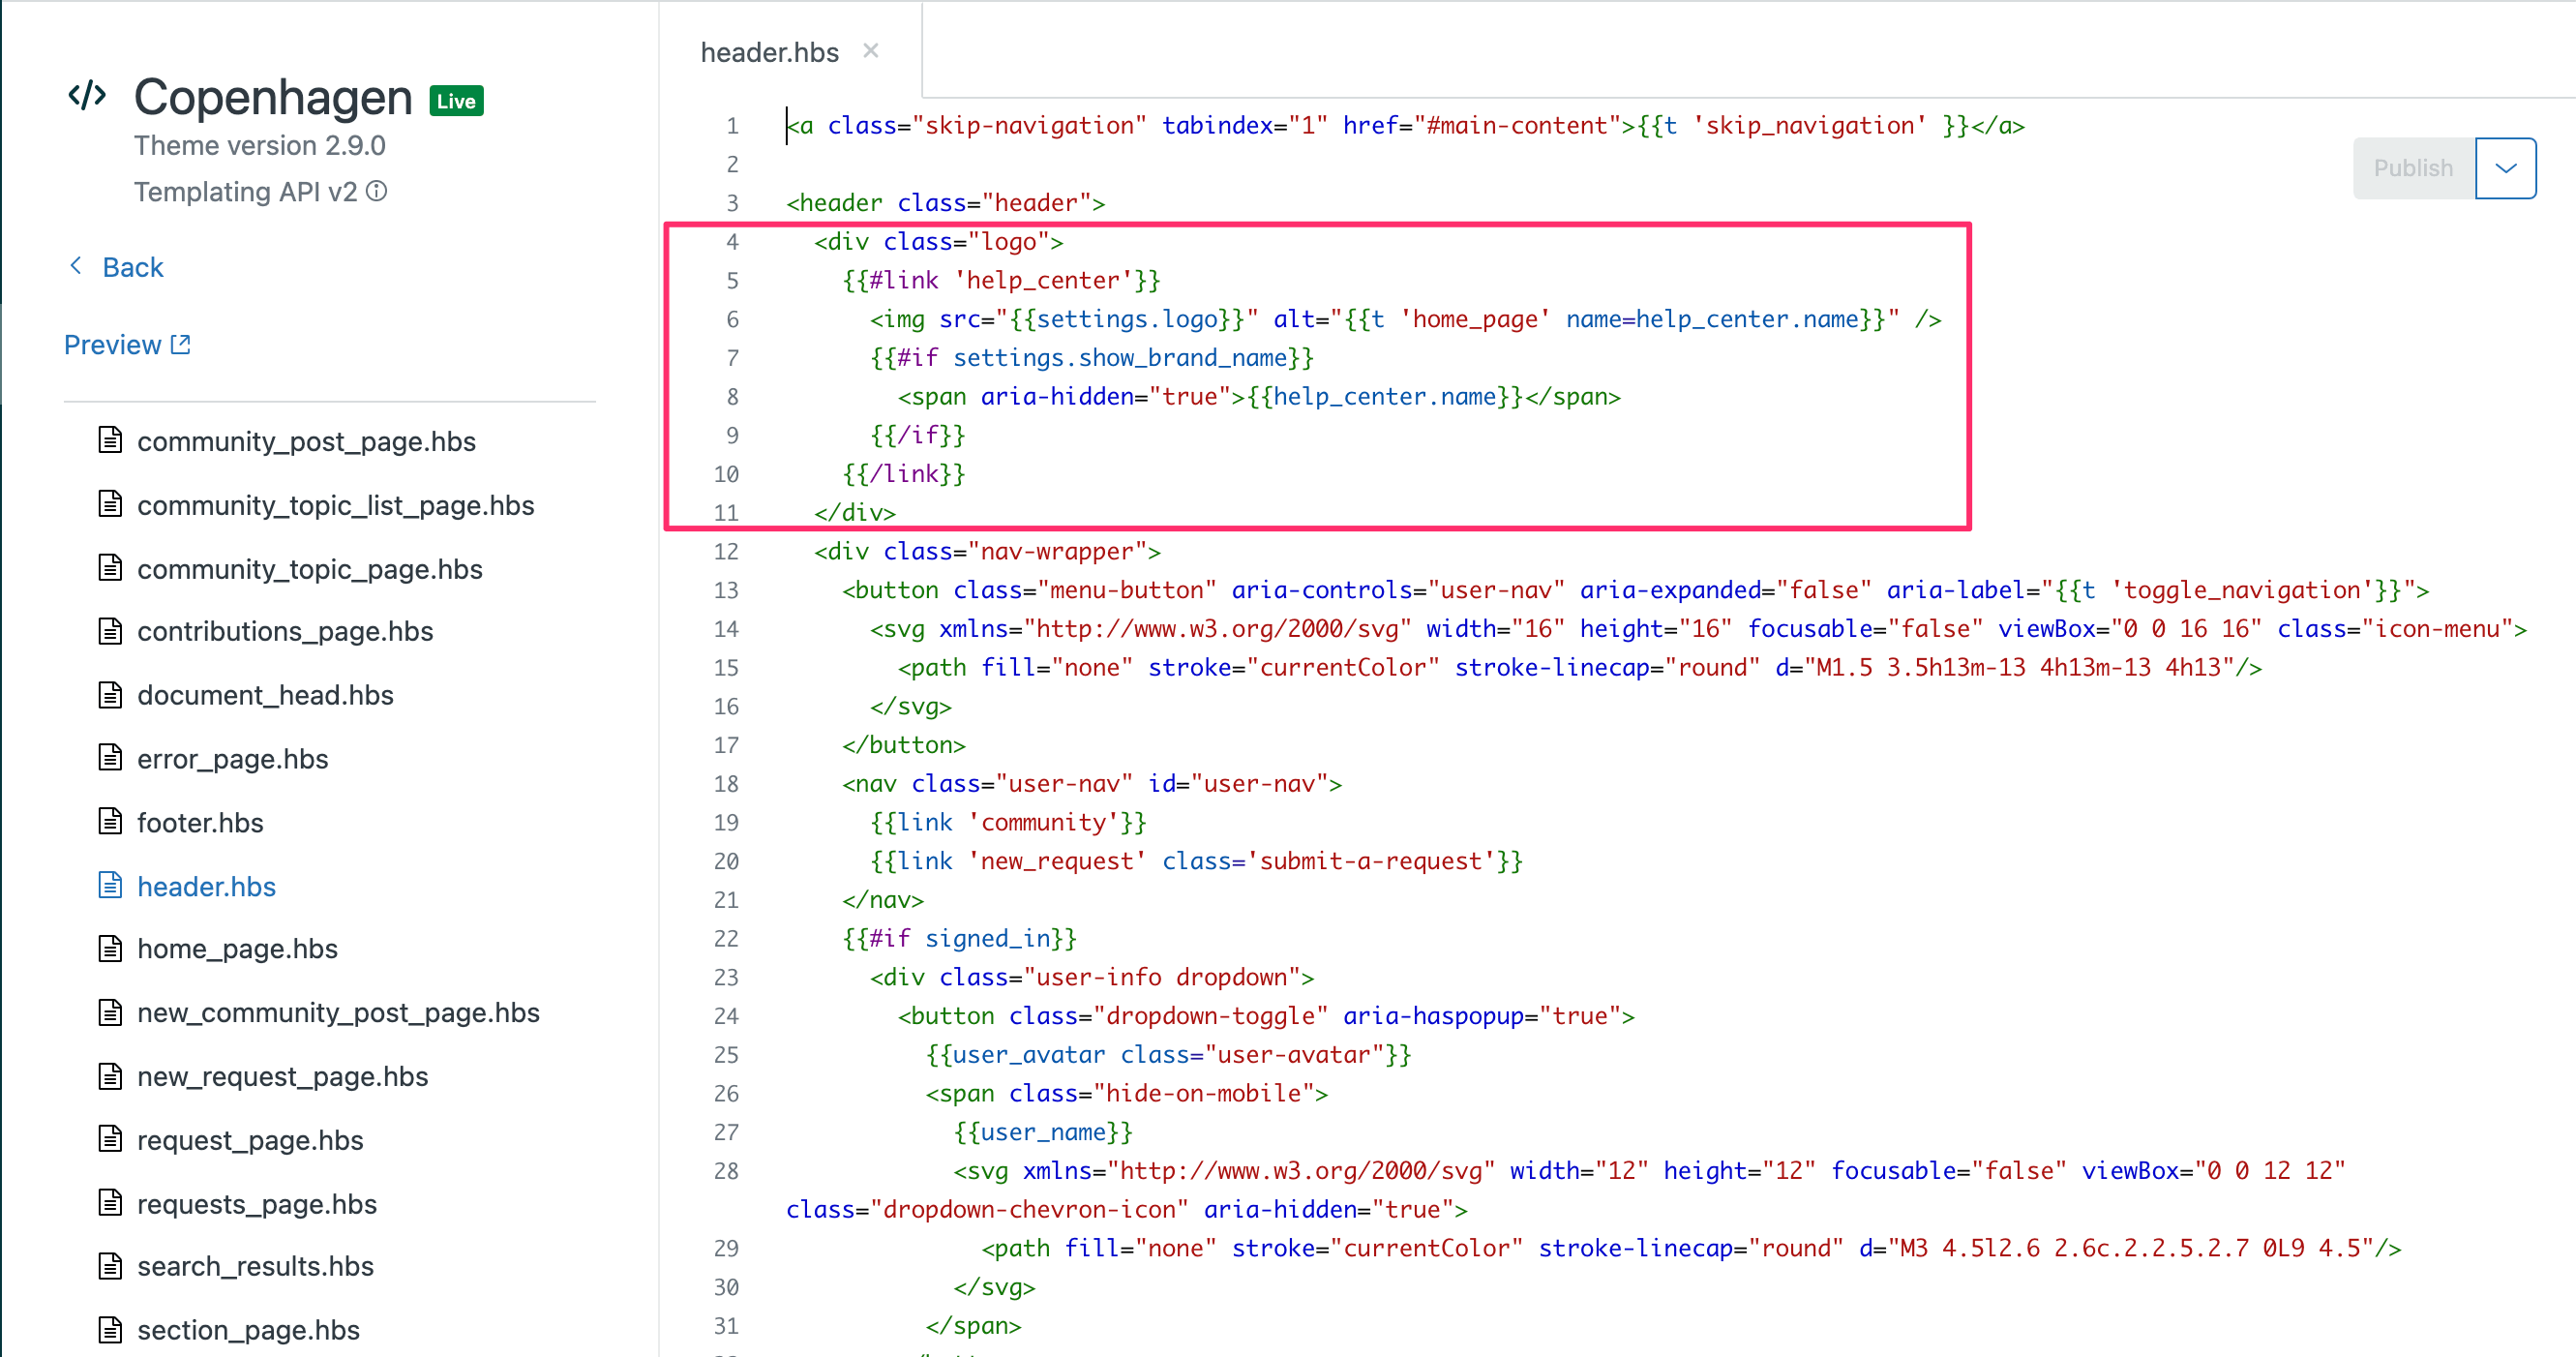
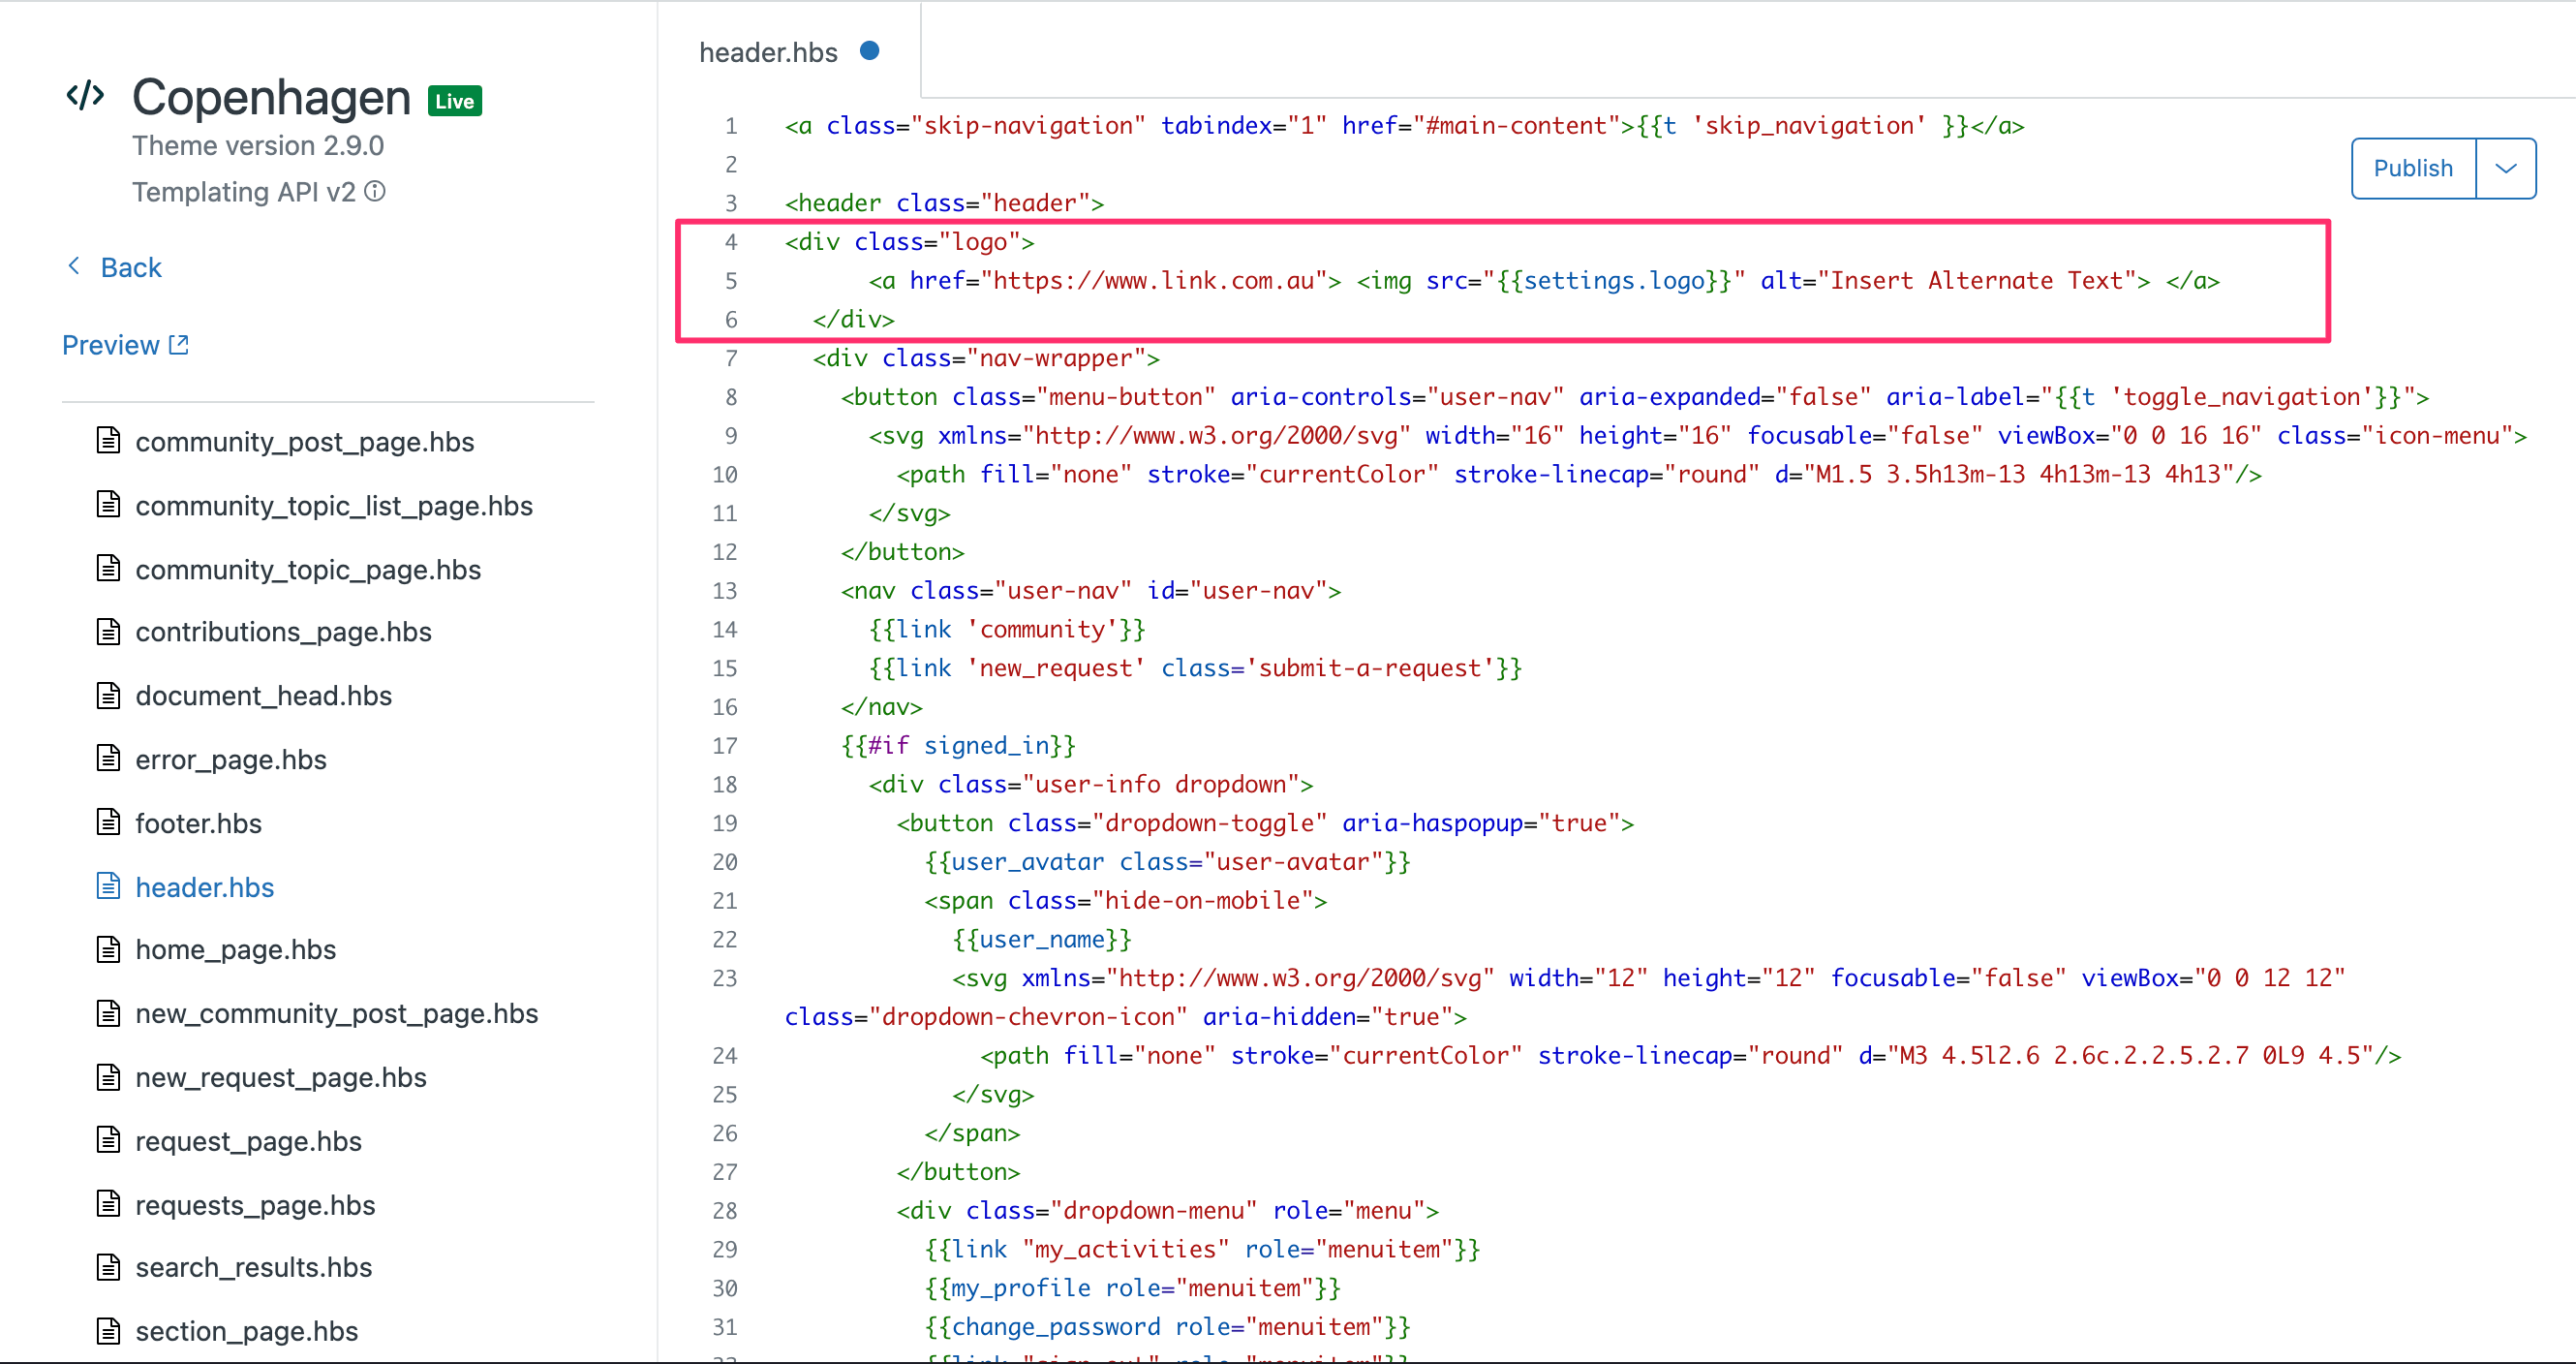
4. You will need to replace the logo div container from lines 4 - 11 with the following:
<div class="logo">
  <a href="https://www.link.com.au"> <img src="{{settings.logo}}" alt="Insert Alternate Text"> </a>
</div>
Be sure to update the following within the new code:
- Update the HTTP: link to your website link
- Update the Alternate Text with your website name
5. Your help centre template code will now look like this:
6. Click the Publish button to save your changes.
You can now view your help centre home page and test the logo button to confirm it will redirect the user to your external website once clicked on.
Please note: The ability to edit the branding on your help centre theme is available on the following Zendesk Plans below. For further information please refer to the full Zendesk guide here:
Editing your Help Centre Theme

