Have you ever wondered how you could copy user profile information into a custom text ticket field? We've got the solution for you here.
In this example, we are wanting to copy some data which lives in a custom field on the user profile and paste it into the same matching fields on a ticket form.
To give you an idea of how it works, the trigger will fire off on a ticket when it meets all of the relevant conditions. The action of the trigger will then ask the webhook to send an API call behind the scenes back to Zendesk and paste the desired data into the ticket field(s).
Using a webhook and trigger in combination to create this solution allows you to effectively copy the required data into a custom text field without any major API development work.
Follow our steps below to set up your own trigger/webhook workflow. Our example is based on the following workflow:
- Copy 3 custom user profile fields into the matching ticket fields upon ticket creation
Before you begin:
- You can use any Zendesk placeholder
- Obtain your API token - Follow the steps here to Generate a new API Token in your Zendesk account
Creating the webhook:
- In Admin Center, click the Apps and integrations icon (
 ) in the sidebar, then select Webhooks > Webhooks.
 - Click Actions and select Create webhook.
- Set up your webhook with the below:
- Example of the endpoint URL: https://{SUBDOMAIN}.zendesk.com/api/v2/tickets/{{ticket.id}}.json
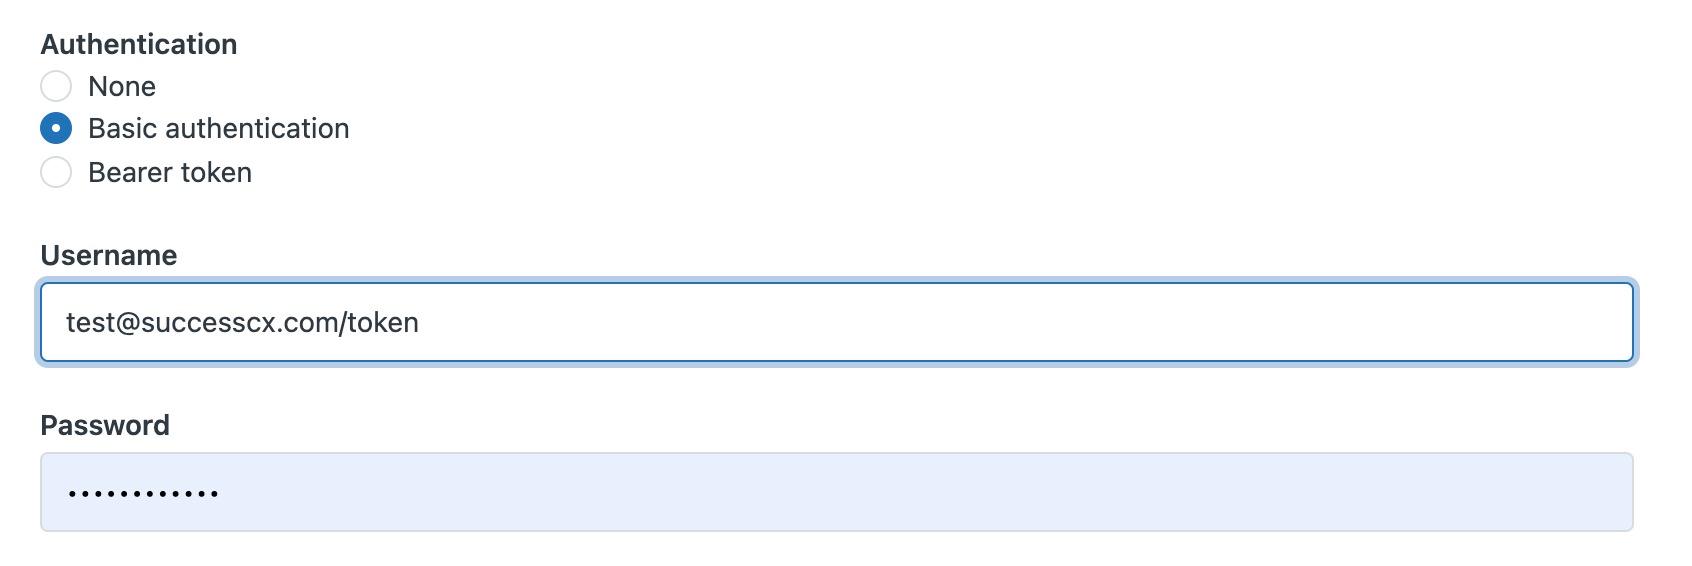
- Authentication: You can choose to use the authentication method which suits your security needs best. We are using Basic Authentication with an API token for this example.
For the authentication, make sure you add the "/token" to the end of your email address in the username field and add the API token as the password.
Creating the trigger:
- In Admin Center, click the Objects and rules icon (
 ) in the sidebar, then select Business rules > Triggers.
 - Click Add trigger.
- Create the trigger conditions.
- Ticket | Is | Created
- Next, configure the trigger to perform the following action:
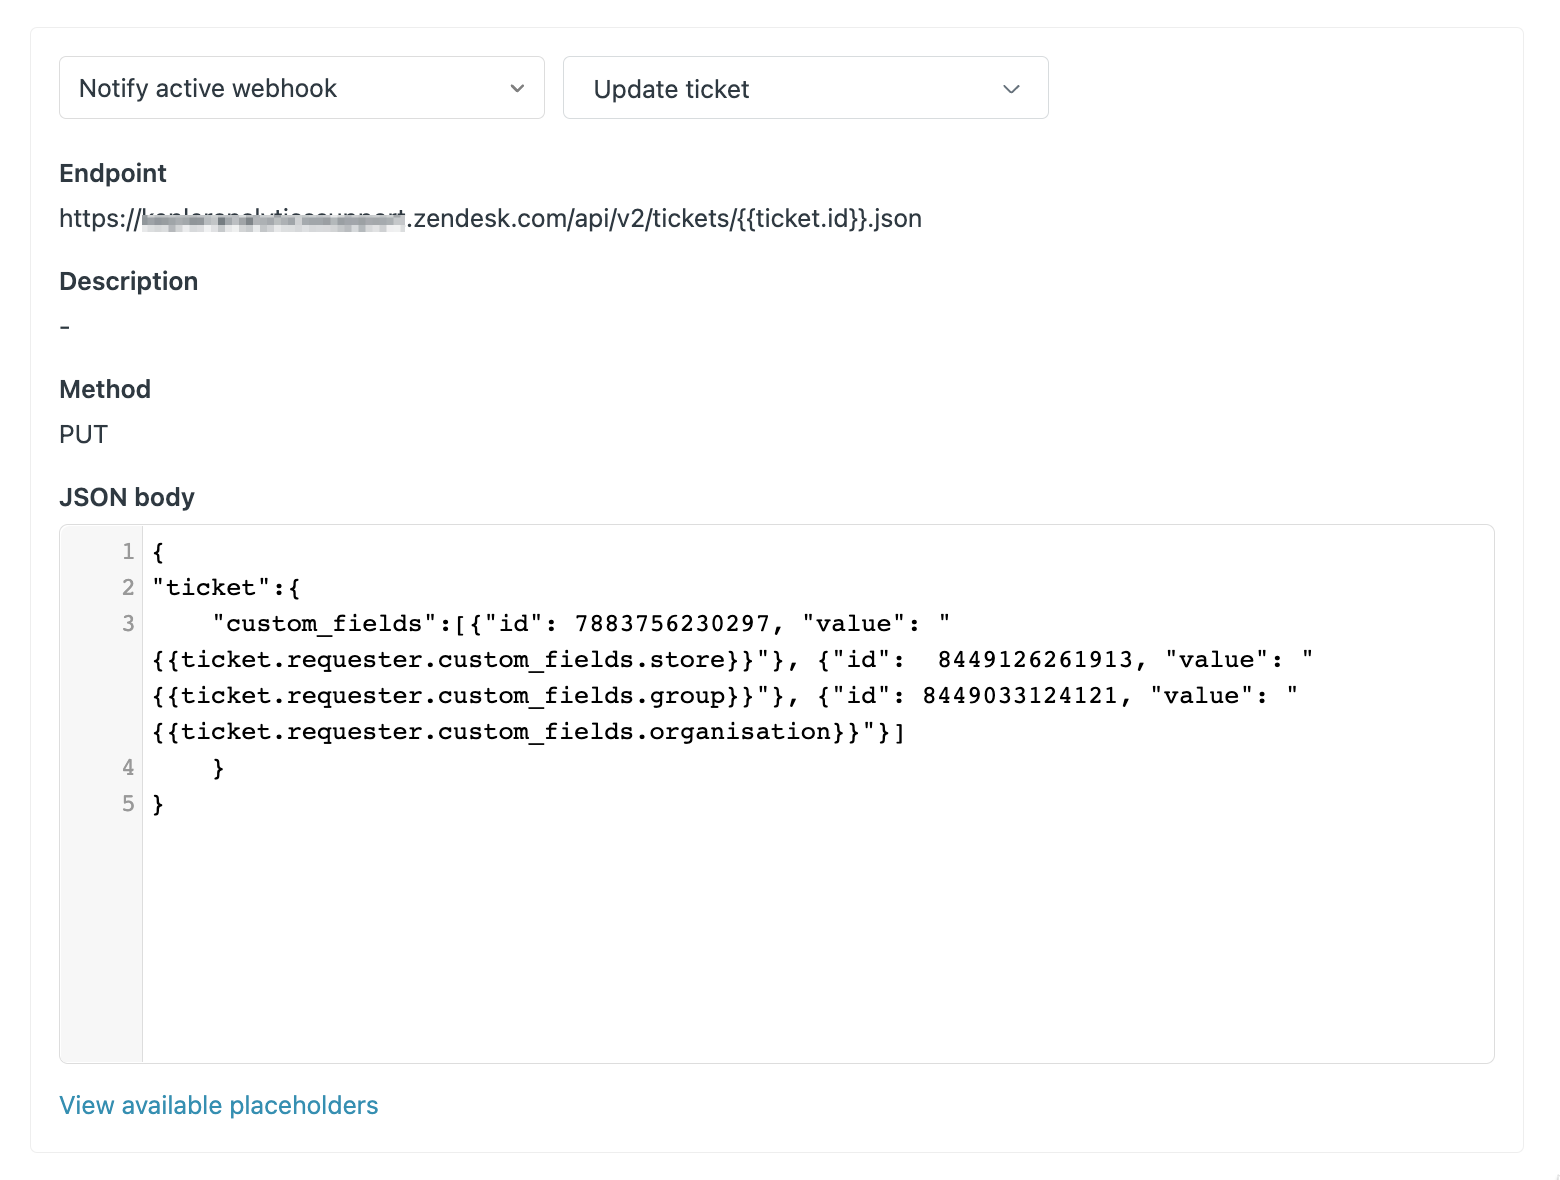
- Notify Active Webhook | Update Ticket
Note: This establishes that all tickets that meet the above conditions will fire off the webhook and instruct the API to update the ticket field accordingly.
- Notify Active Webhook | Update Ticket
- Now add the JSON code into the JSON Body field:
- JSON body example:
-
{You will need to replace the following with your own versions:
"ticket":{
"custom_fields":[{"id": 7883756230297, "value": "{{ticket.requester.custom_fields.store}}"}, {"id": 8449126261913, "value": "{{ticket.requester.custom_fields.group}}"}, {"id": 8449033124121, "value": "{{ticket.requester.custom_fields.organisation}}"}]
}
}- id = the custom field ID number where you will be pasting the info into
- value = the placeholder for the user field
-
- JSON body example:
Limitations:
- This workflow has only been tested with custom text fields
Note: Please use this workflow at your own risk, Zendesk does not provide support for custom workflows of this nature.