
When you create a new ticket form(s), there may be times when you will need to test your new form(s) in an environment that isn't visible to the public (your customers) or Zendesk agents. You can achieve this by aligning your new form(s) to a new test brand help centre in your Zendesk.
Note:
- This setup is available for customers on the Growth suite and above.
- Enterprise & Enterprise Plus Suite customers can utilize the Sandbox feature instead. Follow the steps in this guide here on setting up a Sandbox.
Step 1: Creating the new test brand
-
In Admin Center, click
 Account in the sidebar, then select Brand management > Brands.
 -
Click Add brand.
If this is the first time you are adding a brand, click Get started instead.

-
Enter a Brand name.
-
Enter a Subdomain for this brand's help centre.
-
We recommend creating a unique subdomain that your customers will not know.
-
-
e.g mycompanytest.zendesk.com
-
-
-
-
Click Save changes.
Your new brand is created and added to your list of all brands. Stay on the brand setting page to continue setting up the help centre linked to your test brand.
Step 2: Creating the new test brand help centre
-
On the brand settings page for the new brand you have just created, under the help centre section, click Create.
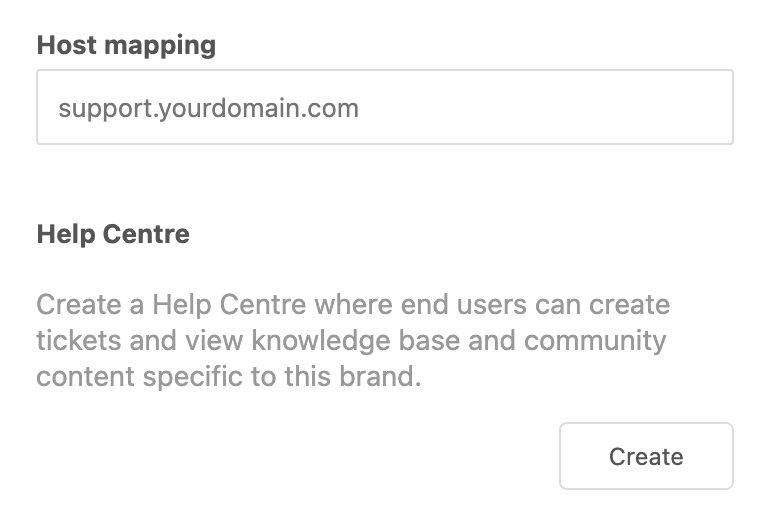
-
Click Create yours today. (If this window appears)
-
Select a theme or click Skip for now.
When finished, you'll see confirmation that your new help centre has been created. The create button will now display as a Manage button.
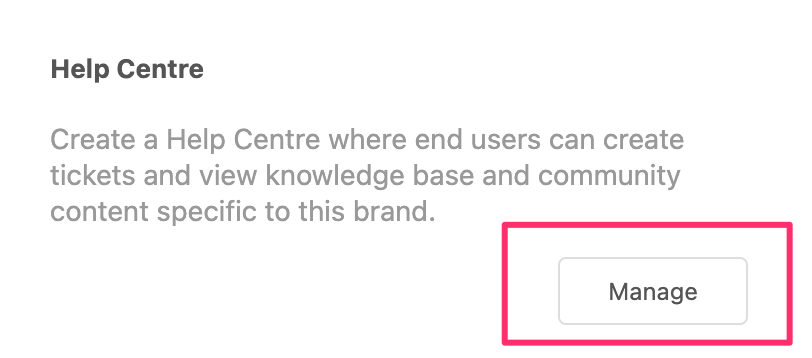
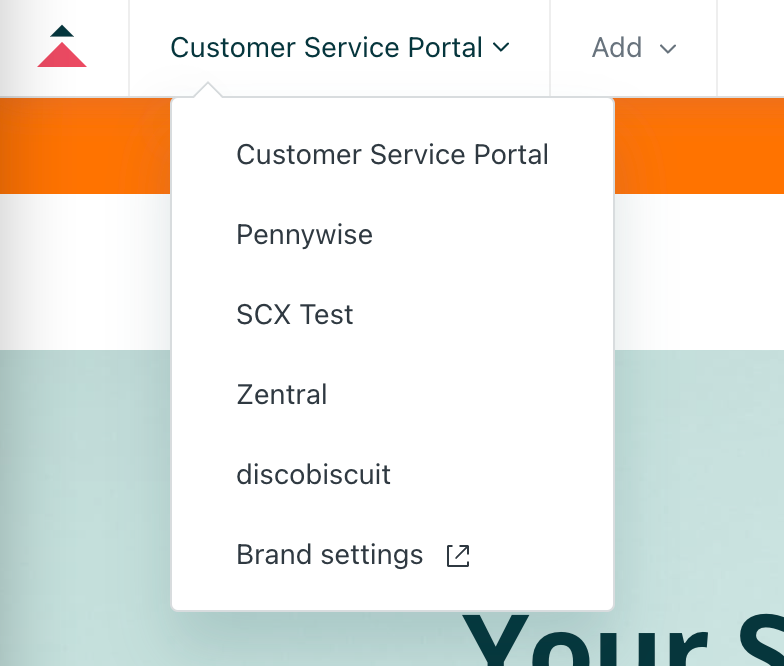
You can access your new test help centre 2 different ways:
- Whilst on the Brand Settings page for your test brand, click on the Manage button under Help Centre.
- From Support first, click Zendesk Products (
 ) in the upper right and select Guide to open Help Center. In one of your Help Centers, click the brand drop-down in the top menu bar and select your test brand.
Step 3: Align your new ticket form to the test help centre
After you've created your new form, you can align it to the new help centre for testing purposes.
- In Admin Center, click the Objects and rules icon (
 ) in the sidebar, then select Tickets > Forms.
 - Open the new ticket form you have created to edit the settings
- Deselect the Apply to all brands option.
- Click the Associated brands text box and select the test brand you would like the new form(s) to appear on for testing
- Click Save Form.
The form(s) will now be visible on the test brand only.
Once you have finished testing the new forms, you can then realign them back to the public-facing brand on your Zendesk in order to roll them out for your customers and agents to use. Don't forget to also deactivate any old forms you may not need if you are replacing them with new ones. 😉
Note: You can find further information on creating ticket forms here: Creating multiple ticket forms to support different request types
Optional: Activating your test brand to the public
In order to easily test the new form, you can activate the test help centre to be publicly accessible for testing. This will allow you and other colleagues to access the test help centre via an incognito window in your test browser and simulate an end-user experience to test the form(s) as you need.
To activate your help centre
- In Guide, click the Settings (
 ) icon in the sidebar.
 - In Guide settings, click Activate.
- Click Activate again to confirm that you want to activate your help centre.
Your true customers/end-users will not know this help centre is active or exists, as it's not a URL that you have advertised to them to use.
At a later date, you can deactivate the test help centre from being publicly visible. Follow the Zendesk Guide here on how to deactivate your help centre - Deactivating your Help Center.